This page was generated from docs/devices/quick-xylo/xylo-audio-intro.ipynb.
Interactive online version:

🐝🎵 Introduction to Xylo™Audio
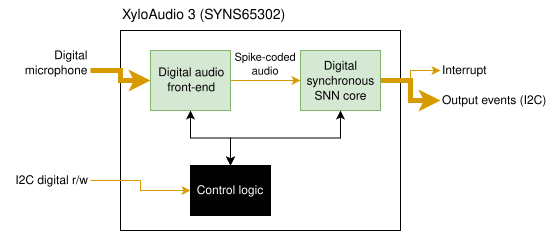
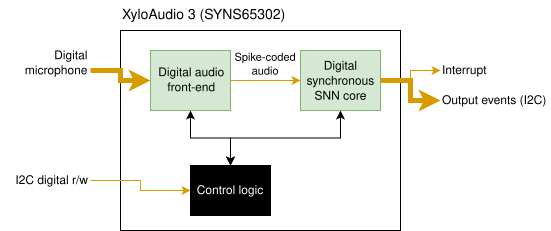
Xylo™Audio is a platform for audio sensory processing that combines a low-power analog audio front-end with a low-power SNN inference core. Xylo™Audio is designed for sub-mW audio processing in always-on applications.
This notebook provides an overview of interfacing with Rockpool and the various cores of Xylo™Audio.
See also 🐝⚡️ Quick-start with Xylo™ SNN core and Using the analog frontend model.
Note: In this tutorial Xylo™Audio refers to Xylo™Audio 2 and Xylo™Audio 3. In case differences occur we will explicitly name the correct HDK.
[1]:
# Specify the xylo board you would like to use for this tutorial

# Available boards: XyloAudio2 and XyloAudio3
xylo_board_name = 'XyloAudio3'
[2]:
# - Display images
from IPython.display import Image

Image('xylo-a2-block-level.png')
[2]:
[3]:
# - Display images
from IPython.display import Image

Image('xylo-a3-block-level.png')
[3]:
Part I: Using the XyloAudio SNN Core
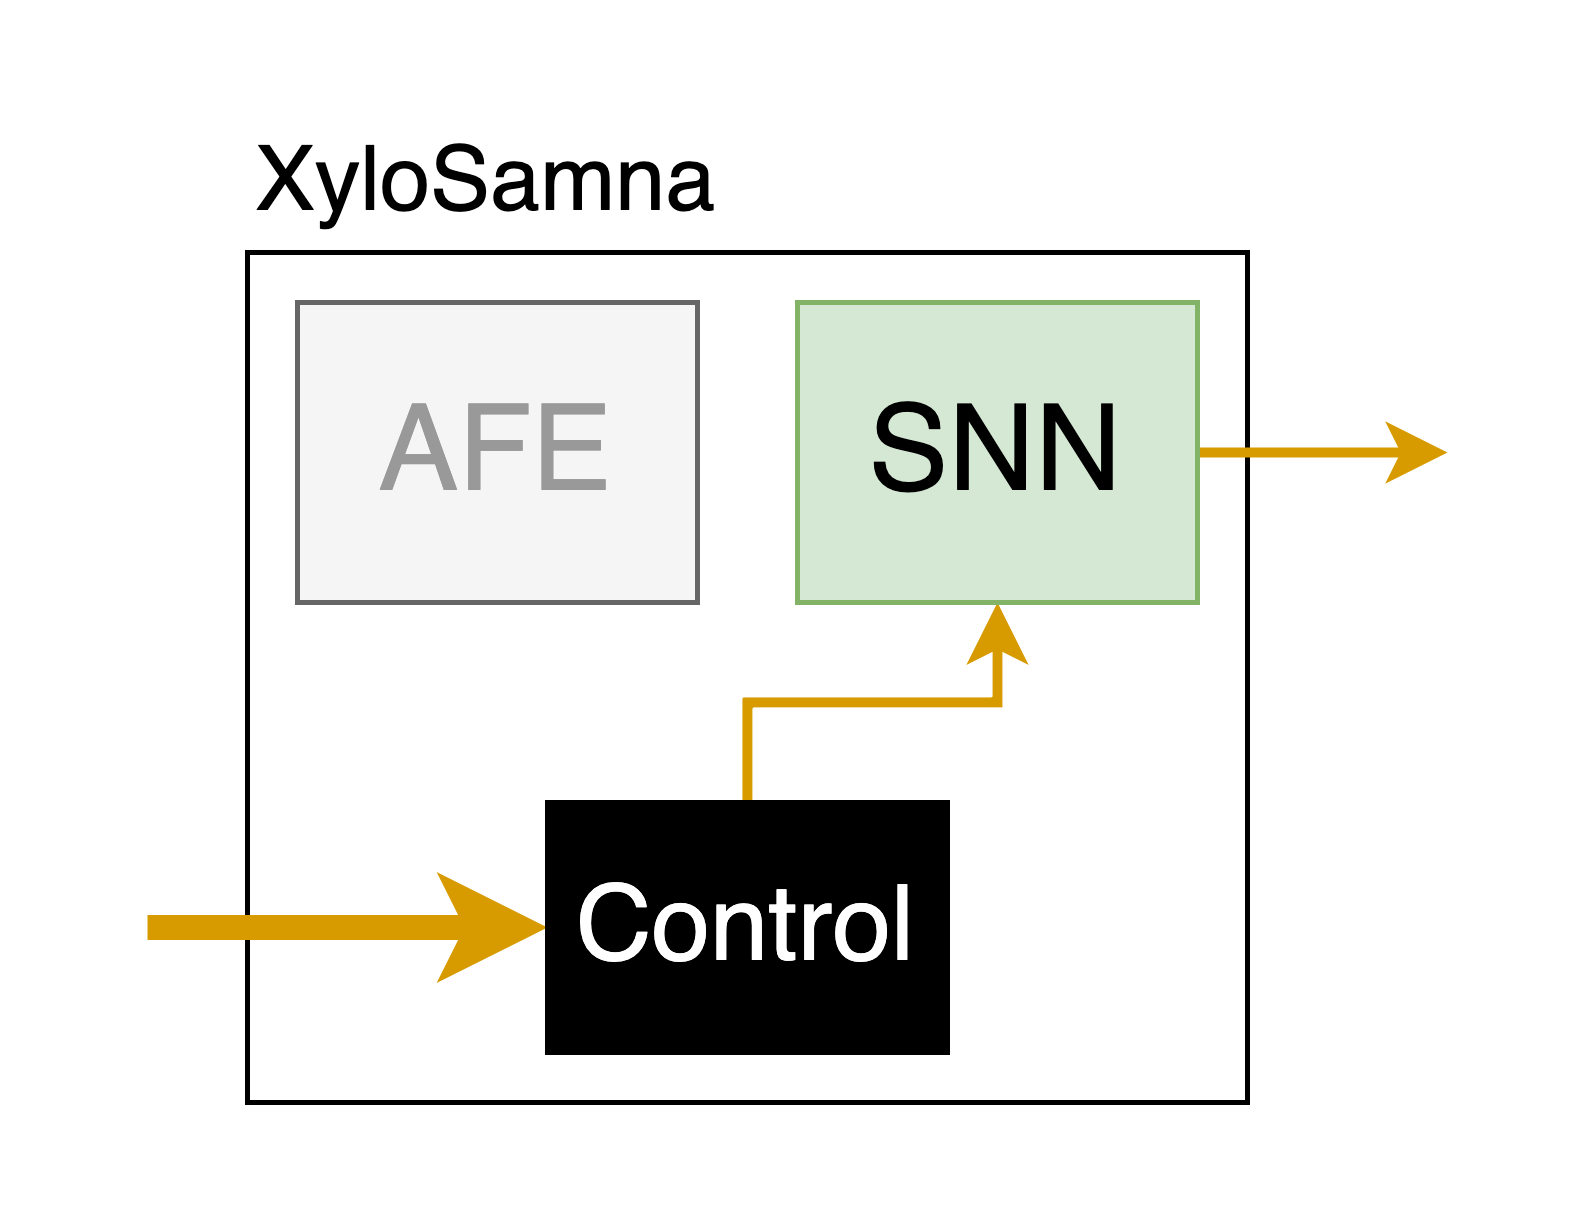
Interfacing with the XyloAudio SNN core is the same as for other Xylo family devices, making use of the Xylo deployment pipeline;
syns61201.XyloSim and syns61201.XyloSamna, for XyloAudio 2;
and syns65302.XyloSim and syns65302.XyloSamna, for XyloAudio 3.
See also 🐝⚡️ Quick-start with Xylo™ SNN core and 🐝 Overview of the Xylo™ family.
[4]:
Image('XyloSamna.png', width=400)
[4]:
Step 1: Build a network in rockpool and convert it to a hardware configuration
[5]:
# - Import the computational modules and combinators required for the network
from rockpool.nn.modules import LIFTorch, LinearTorch
from rockpool.nn.combinators import Sequential, Residual
from rockpool.transform import quantize_methods as q
from rockpool import TSEvent, TSContinuous

# - Imports dependent on your HDK
# - XyloAudio 2
if xylo_board_name == 'XyloAudio2':
    import rockpool.devices.xylo.syns61201 as xa2
    from rockpool.devices.xylo.syns61201 import xa2_devkit_utils as xa2utils
# - XyloAudio 3
elif xylo_board_name == 'XyloAudio3':
    import rockpool.devices.xylo.syns65302 as xa3
    from rockpool.devices.xylo.syns65302 import xa3_devkit_utils as xa3utils

import numpy as np

try:
    from rich import print
except:
    pass

import sys
!{sys.executable} -m pip install --quiet matplotlib
import matplotlib.pyplot as plt
%matplotlib inline
plt.rcParams['figure.figsize'] = [12, 4]
plt.rcParams['figure.dpi'] = 300

# - Disable warnings
import warnings
warnings.filterwarnings('ignore')

from IPython import display
[6]:
# - Define the size of the network layers
Nin = 2
Nhidden = 4
Nout = 2
dt = 1e-3
[7]:
# - Define the network architecture using combinators and modules
net = Sequential(
    LinearTorch((Nin, Nhidden), has_bias = False),
    LIFTorch(Nhidden, dt = dt),

    Residual(
        LinearTorch((Nhidden, Nhidden), has_bias = False),
        LIFTorch(Nhidden, has_rec = True, threshold = 1., dt = dt),
    ),

    LinearTorch((Nhidden, Nout), has_bias = False),
    LIFTorch(Nout, dt = dt),
)
print(net)

# - Scale down recurrent weights for stability
# net[2][1].w_rec.data = net[2][1].w_rec / 10.
TorchSequential  with shape (2, 2) {
    LinearTorch '0_LinearTorch' with shape (2, 4)
    LIFTorch '1_LIFTorch' with shape (4, 4)
    TorchResidual '2_TorchResidual' with shape (4, 4) {
        LinearTorch '0_LinearTorch' with shape (4, 4)
        LIFTorch '1_LIFTorch' with shape (4, 4)
    }
    LinearTorch '3_LinearTorch' with shape (4, 2)
    LIFTorch '4_LIFTorch' with shape (2, 2)
}
[8]:
# - Call the Xylo mapper on the extracted computational graph
# - For XyloAudio 2
if xylo_board_name == 'XyloAudio2':
    spec = xa2.mapper(net.as_graph(),  weight_dtype='float', threshold_dtype='float', dash_dtype='float')
# - For XyloAudio 3
elif xylo_board_name == 'XyloAudio3':
    spec = xa3.mapper(net.as_graph(),  weight_dtype='float', threshold_dtype='float', dash_dtype='float')

# - Quantize the specification
spec.update(q.global_quantize(**spec))

# # you can also try channel-wise quantization
# spec.update(q.channel_quantize(**spec))
# print(spec)

# - Use rockpool.devices.xylo.config_from_specification to convert it to a hardware configuration
# - For XyloAudio 2
if xylo_board_name == 'XyloAudio2':
    config, is_valid, msg = xa2.config_from_specification(**spec)
# - For XyloAudio 3
elif xylo_board_name == 'XyloAudio3':
    config, is_valid, msg = xa3.config_from_specification(**spec)

if not is_valid:
    print(msg)

%store config
Stored 'config' (XyloConfiguration)
[9]:
# - Use rockpool.devices.xylo.find_xylo_hdks to connect to an HDK
from rockpool.devices.xylo import find_xylo_hdks
xylo_hdk_nodes, modules, versions = find_xylo_hdks()
print(versions)

hdk = None

for version, xylo in zip(versions, xylo_hdk_nodes):
    if version == "syns61201":
        hdk = xylo
    # - For XyloAudio 3
    elif version == "syns65302":
        hdk = xylo

if hdk is None:
    assert False, 'This tutorial requires a connected XyloAudio HDK to demonstrate.'
The connected Xylo HDK contains a XyloAudio 3. Importing `rockpool.devices.xylo.syns65302`
['syns65302']
[10]:
print(xylo_board_name)

# - Use XyloSamna to deploy to the HDK
if hdk:
    # - For XyloAudio 2
    if xylo_board_name == 'XyloAudio2':
        modSamna = xa2.XyloSamna(hdk, config, dt = dt)
    # - For XyloAudio 3
    elif xylo_board_name == 'XyloAudio3':
        modSamna = xa3.XyloSamna(hdk, config, dt = dt)

print(modSamna)
XyloAudio3
XyloSamna with shape (2, 8, 2)
[11]:
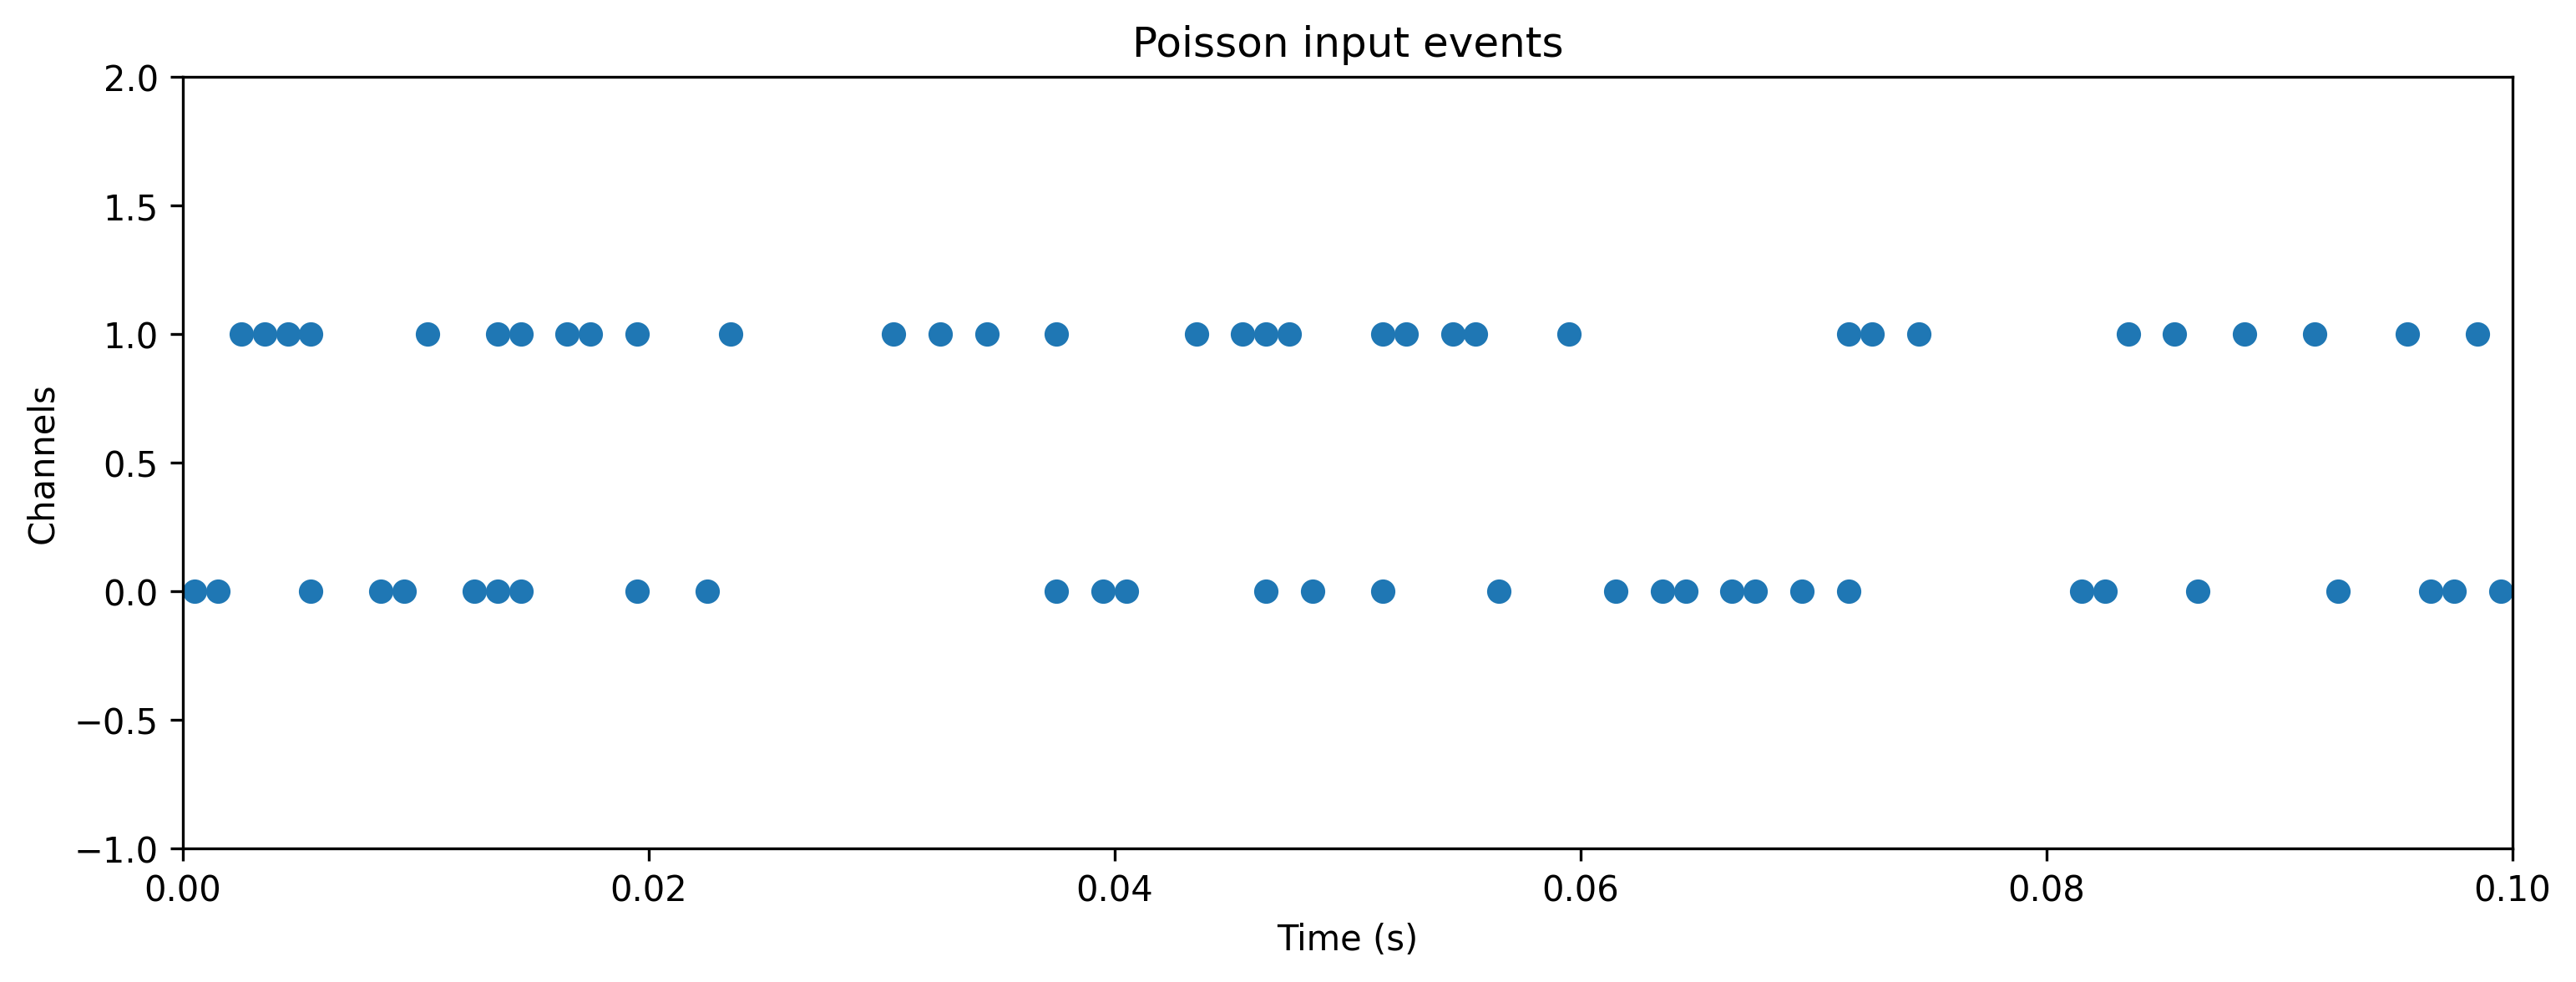
# - Generate some Poisson input
T = 100
f = 0.4
input_spikes = np.random.rand(T, Nin) < f
TSEvent.from_raster(input_spikes, dt, name = 'Poisson input events').plot();
[12]:
# - Evolve the network on the Xylo HDK
# - `reset_state` is only needed for XyloAudio 2
if xylo_board_name == 'XyloAudio2':
    modSamna.reset_state()

out, _, r_d = modSamna(input_spikes, record = True)

# - Show the internal state variables recorded
print(r_d.keys())
dict_keys(['Vmem', 'Isyn', 'Isyn2', 'Spikes', 'Vmem_out', 'Isyn_out', 'times', 'inf_duration'])
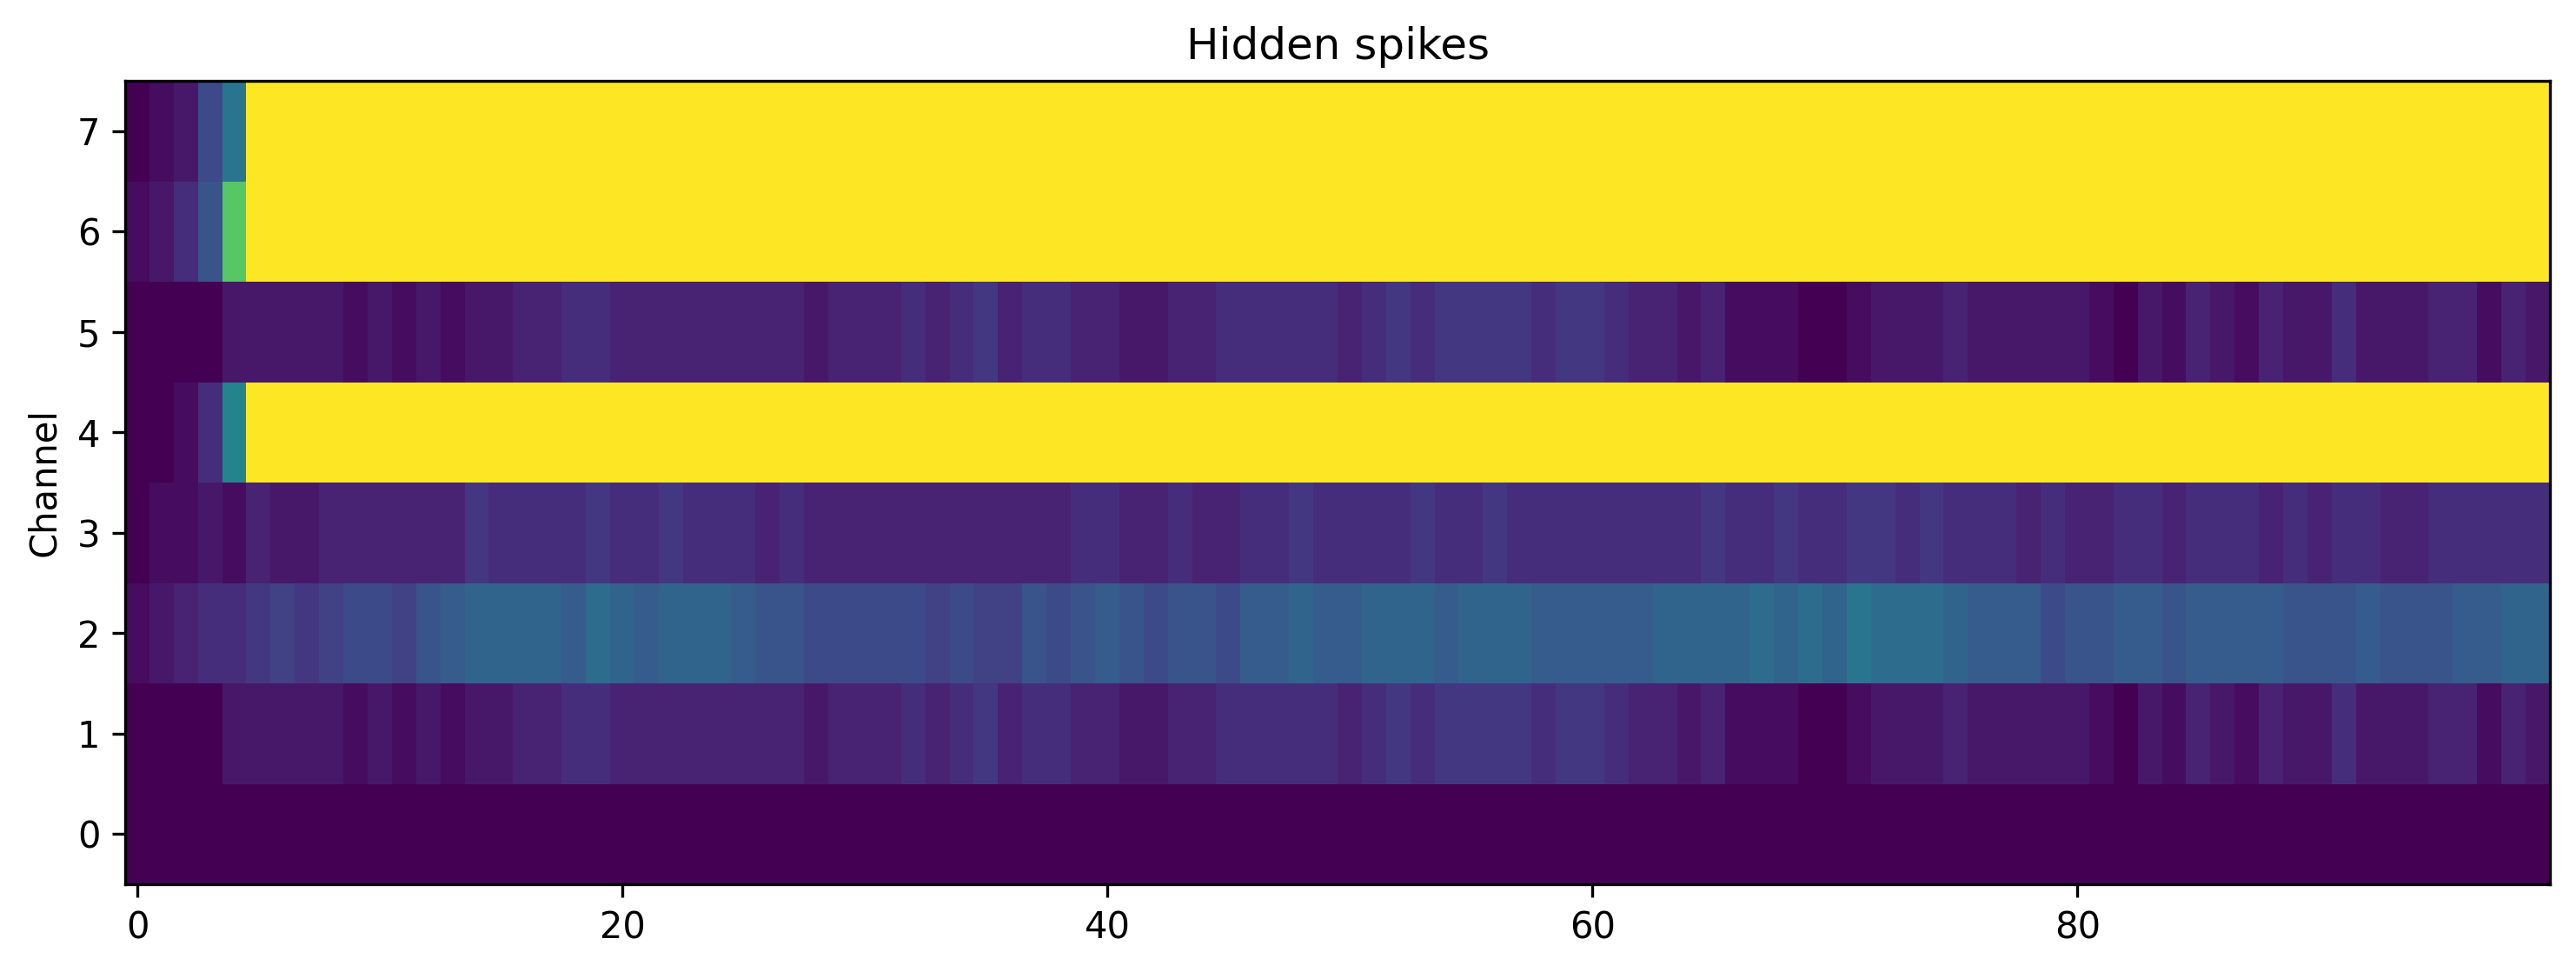
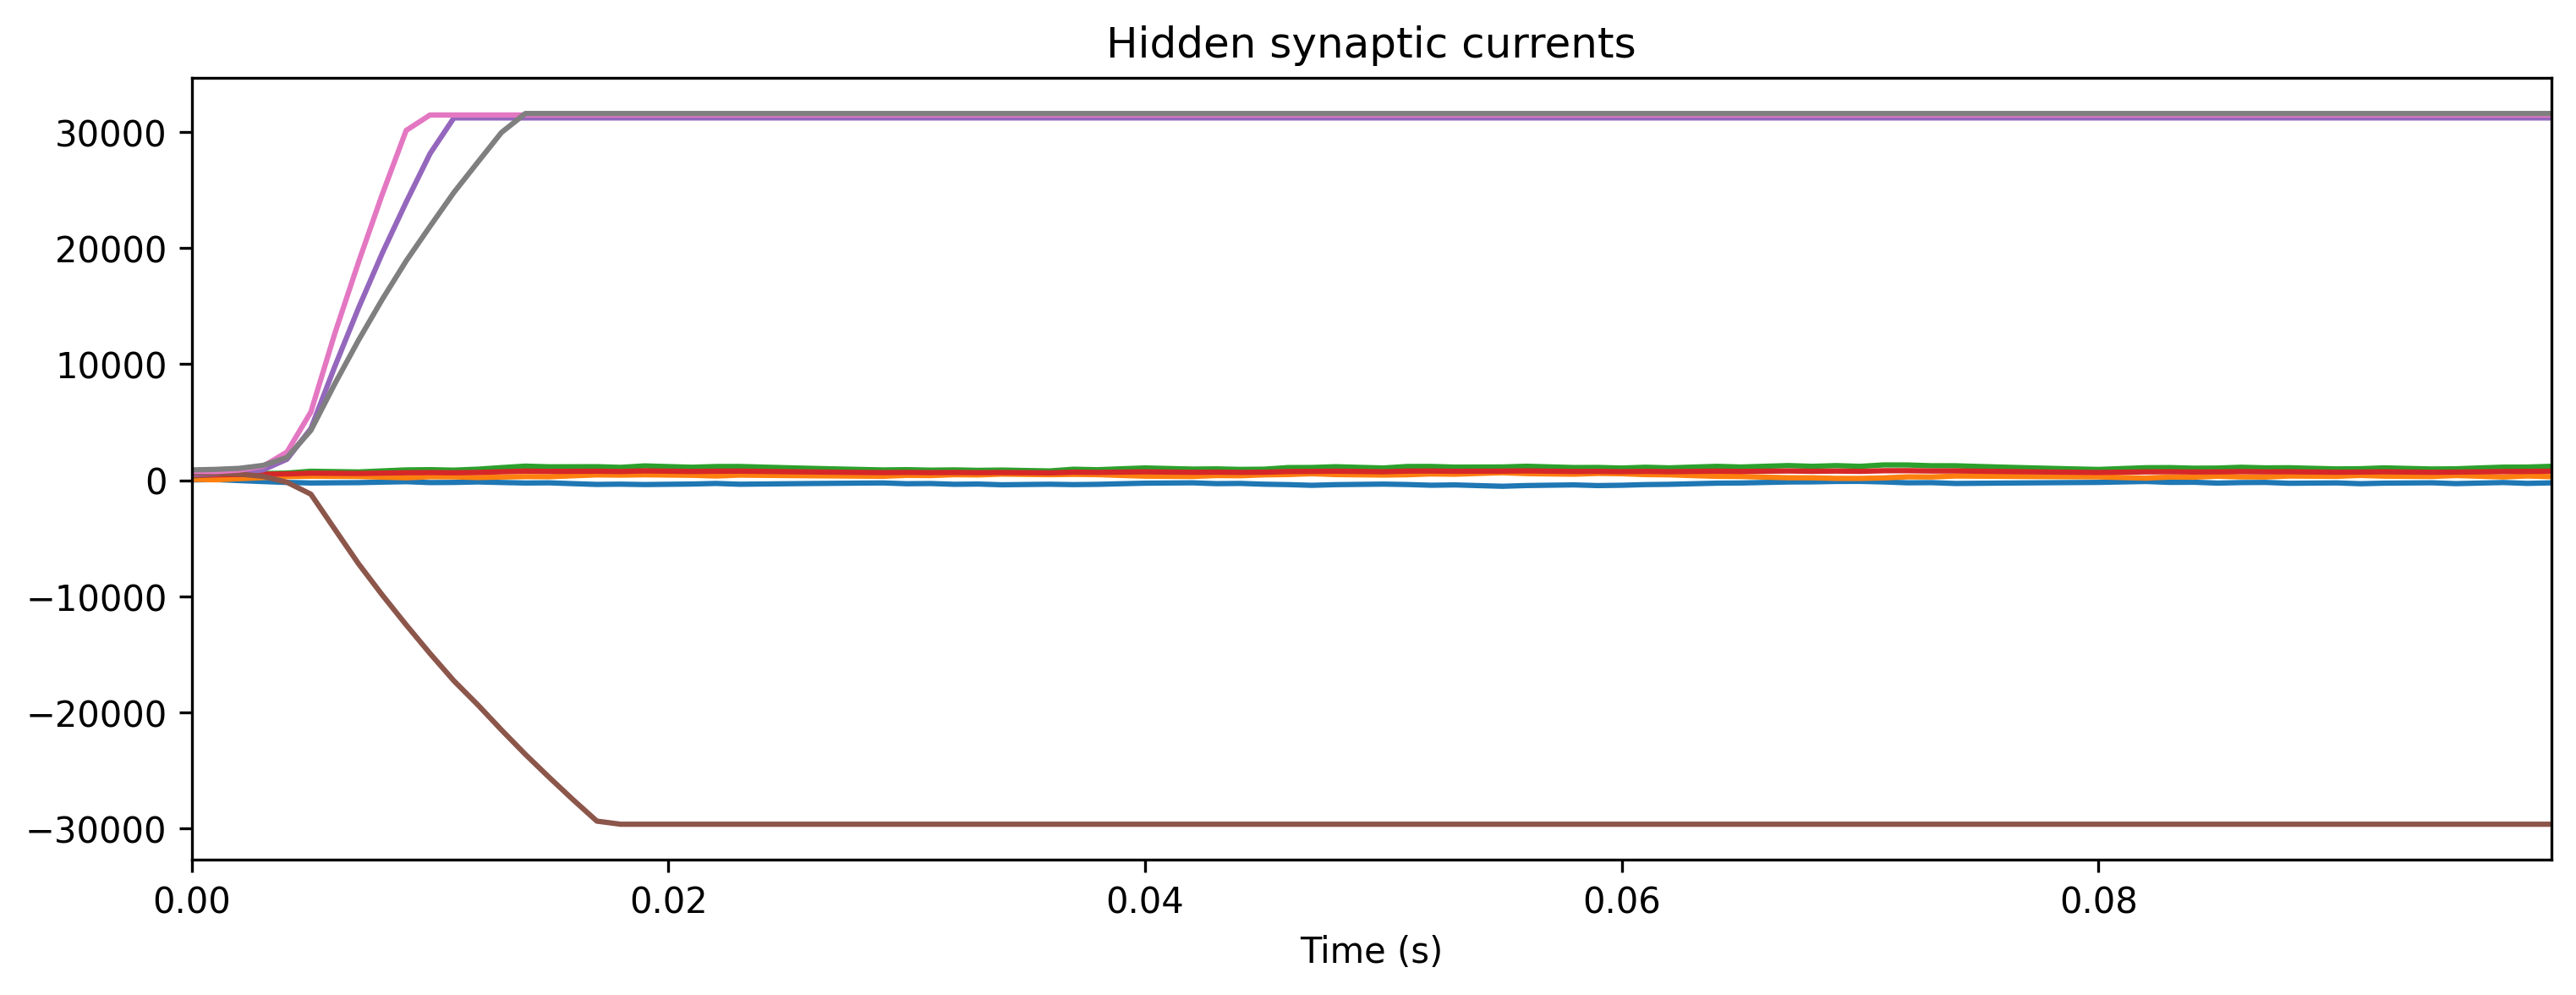
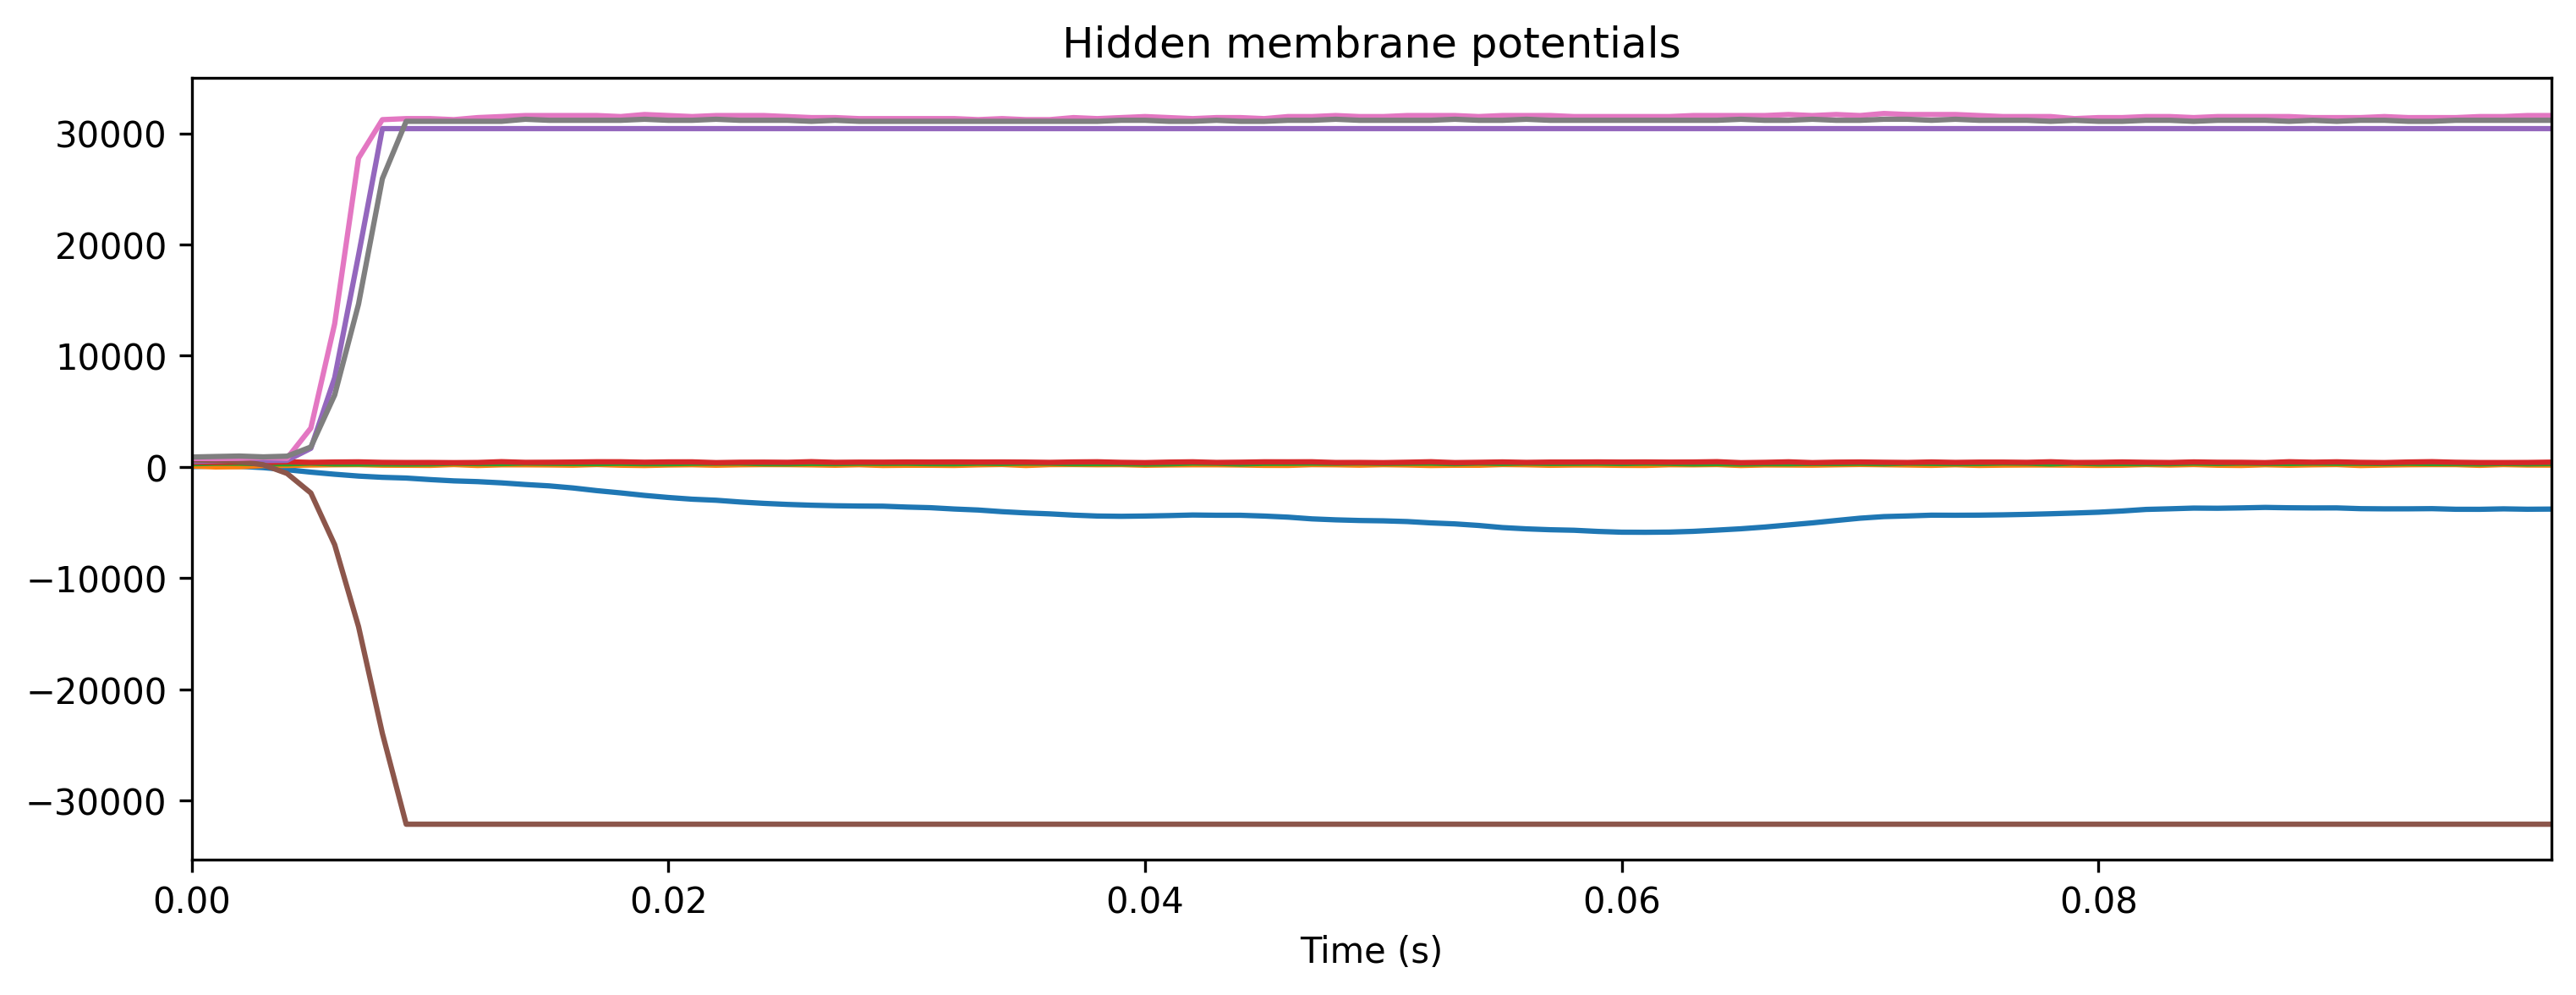
[13]:
# - Plot some internal state variables
plt.figure()
plt.imshow(r_d['Spikes'].T, aspect = 'auto', origin = 'lower')
plt.title('Hidden spikes')
plt.ylabel('Channel')

plt.figure()
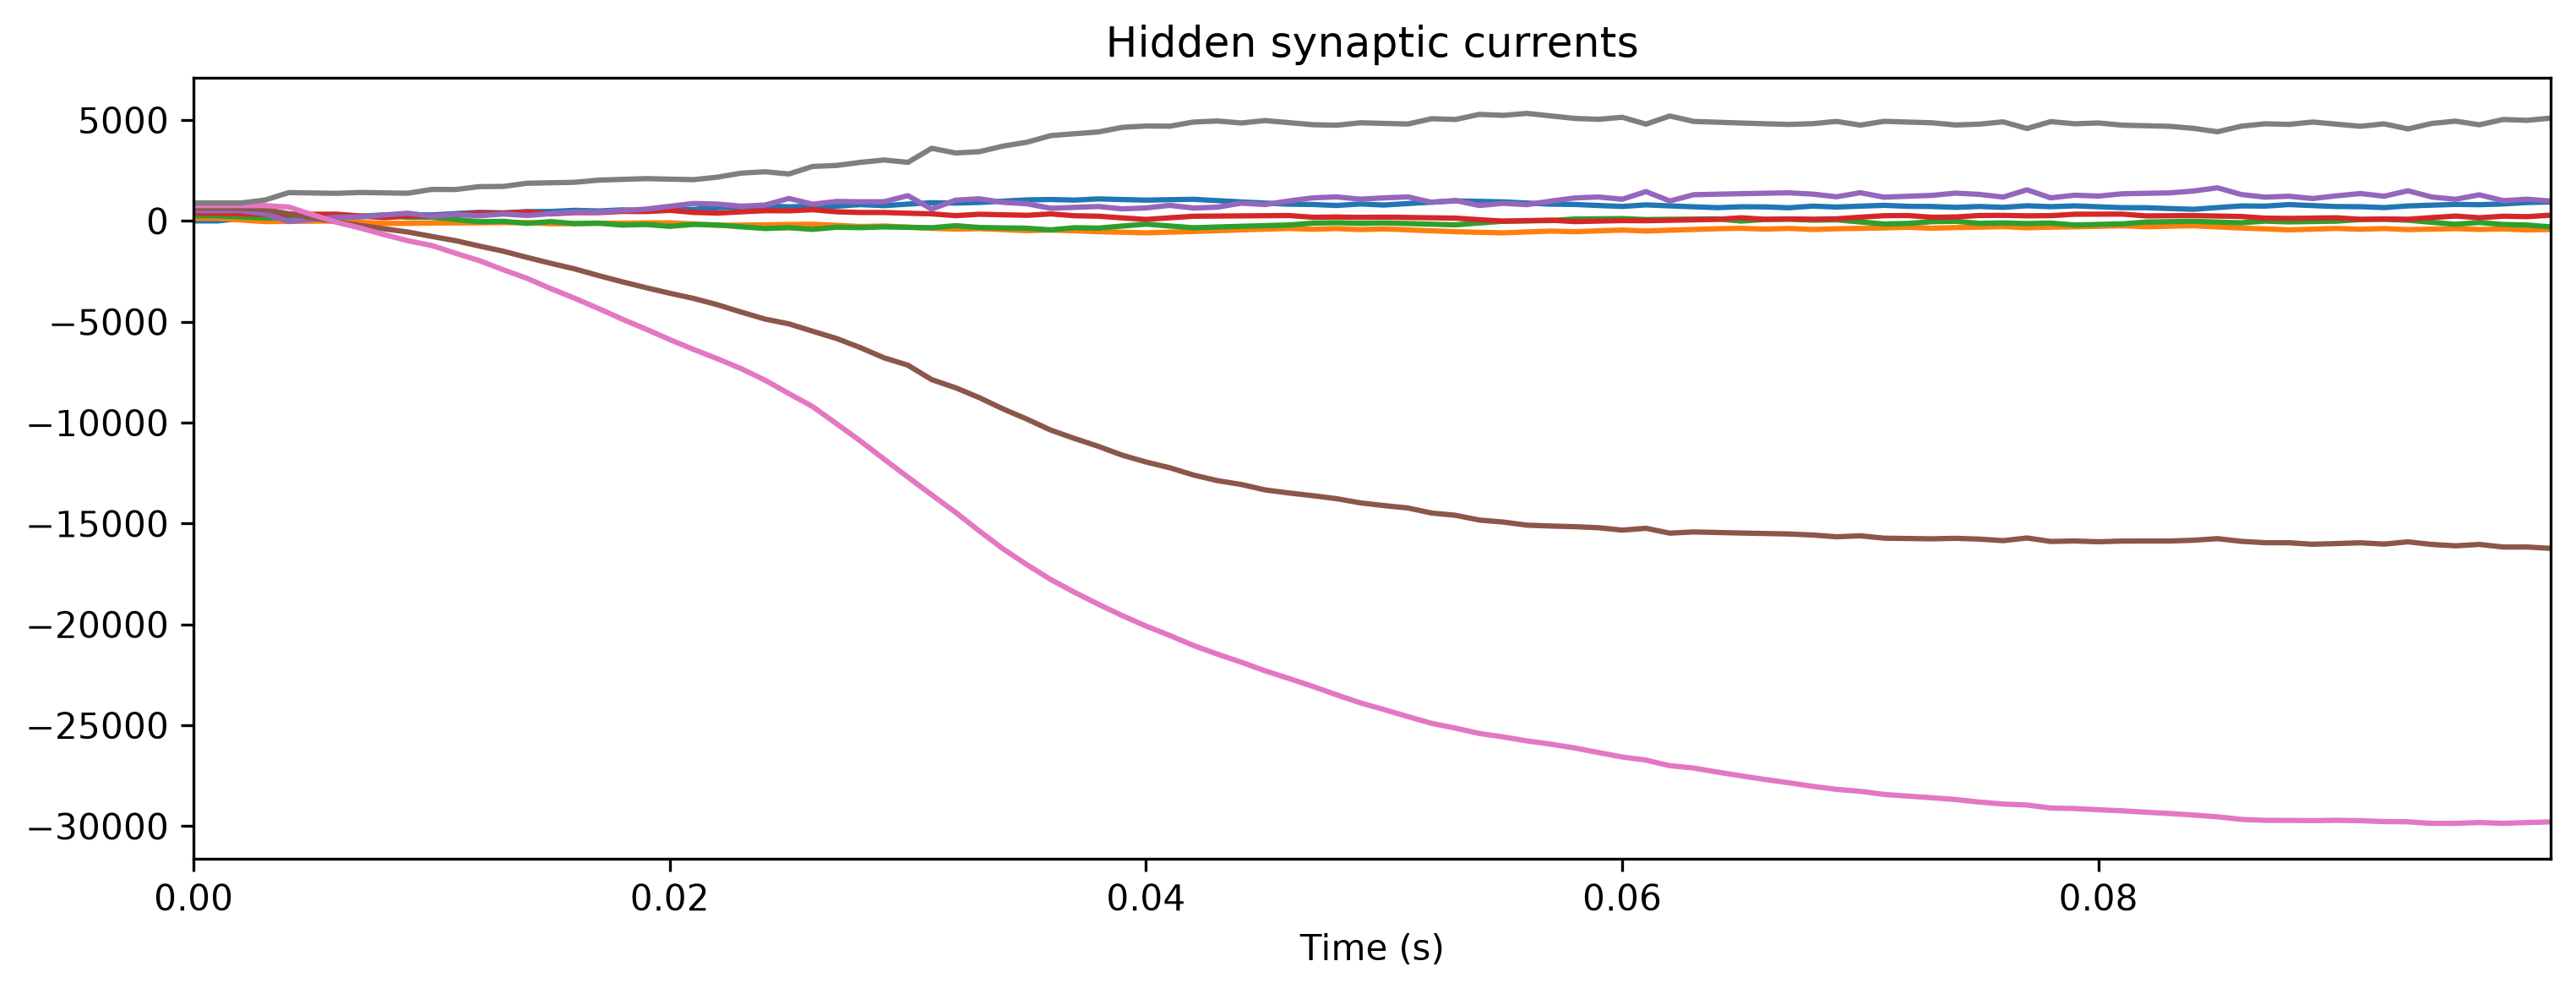
TSContinuous(r_d['times'], r_d['Isyn'], name = 'Hidden synaptic currents').plot(stagger = 127)

plt.figure()
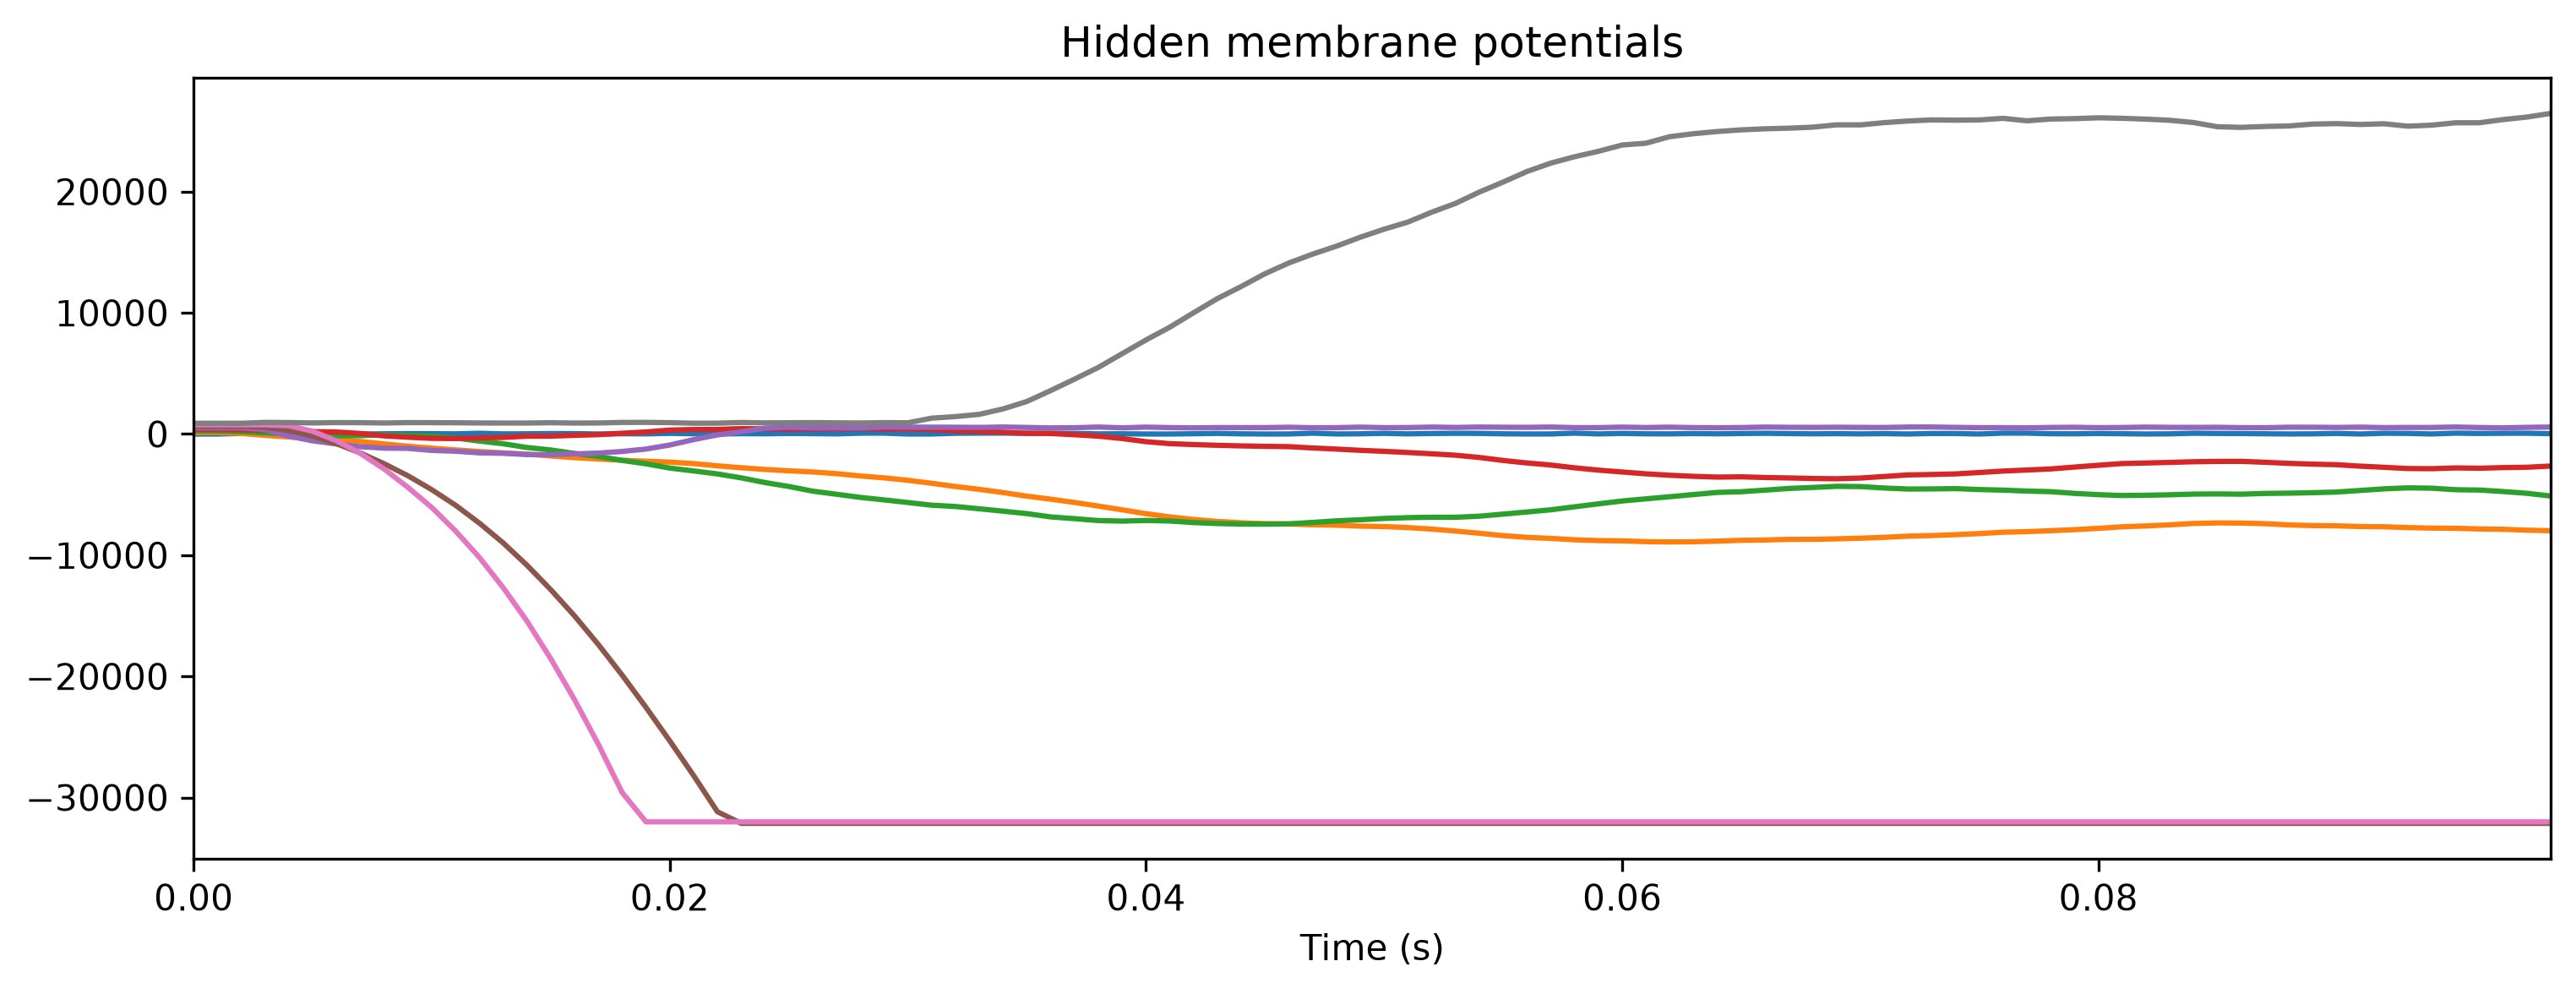
TSContinuous(r_d['times'], r_d['Vmem'], name = 'Hidden membrane potentials').plot(stagger = 127);
Step 3: Simulate the HDK using the XyloSim bit-precise simulator
Note: Xylo™Audio 3 simulator does not handle (yet) second synapses.
[14]:
# - Configure the simulator with the HW network config
# - For XyloAudio 2
if xylo_board_name == 'XyloAudio2':
    modSim = xa2.XyloSim.from_config(config, dt=dt)
# - For XyloAudio 3
elif xylo_board_name == 'XyloAudio3':
    modSim = xa3.XyloSim.from_config(config, dt=dt)

print(modSim)
XyloSim with shape (2, 8, 2)
[15]:
# - Evolve the input over the network, in simulation
out, _, r_d = modSim(input_spikes, record = True)

# - Show the internal state variables recorded
del modSim
print(r_d.keys())
dict_keys(['Vmem', 'Isyn', 'Spikes', 'Vmem_out', 'Isyn_out'])
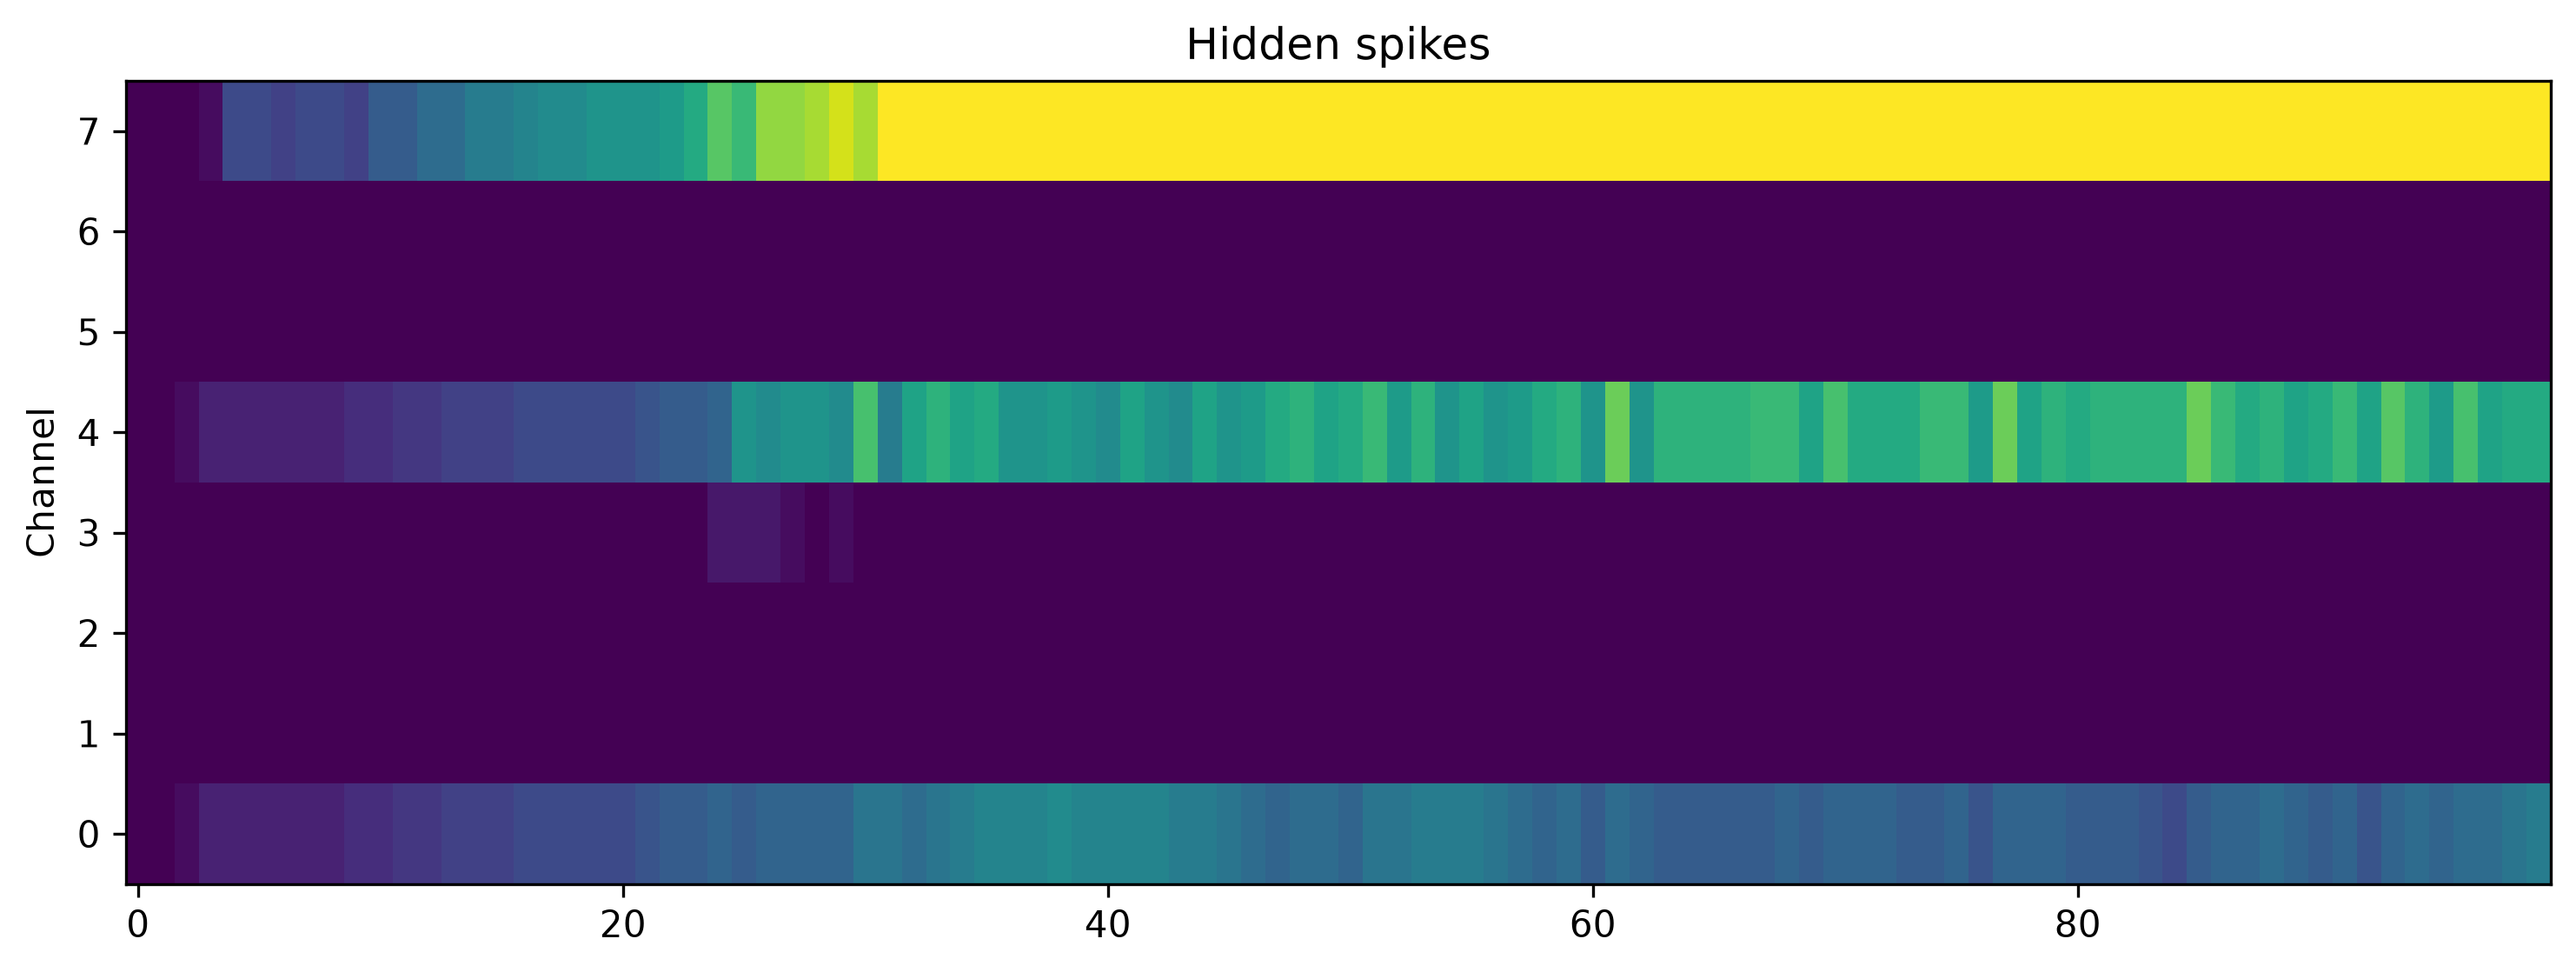
[16]:
# - Plot some internal state variables
plt.figure()
plt.imshow(r_d['Spikes'].T, aspect = 'auto', origin = 'lower')
plt.title('Hidden spikes')
plt.ylabel('Channel')

plt.figure()
TSContinuous.from_clocked(r_d['Isyn'], dt, name = 'Hidden synaptic currents').plot(stagger = 127);

plt.figure()
TSContinuous.from_clocked(r_d['Vmem'], dt, name = 'Hidden membrane potentials').plot(stagger = 127);
Part II: Using the XyloAudio audio front-end interface
Note: Audio front-end is only available in Xylo™Audio 2. This step does not applied to Xylo™Audio 3.
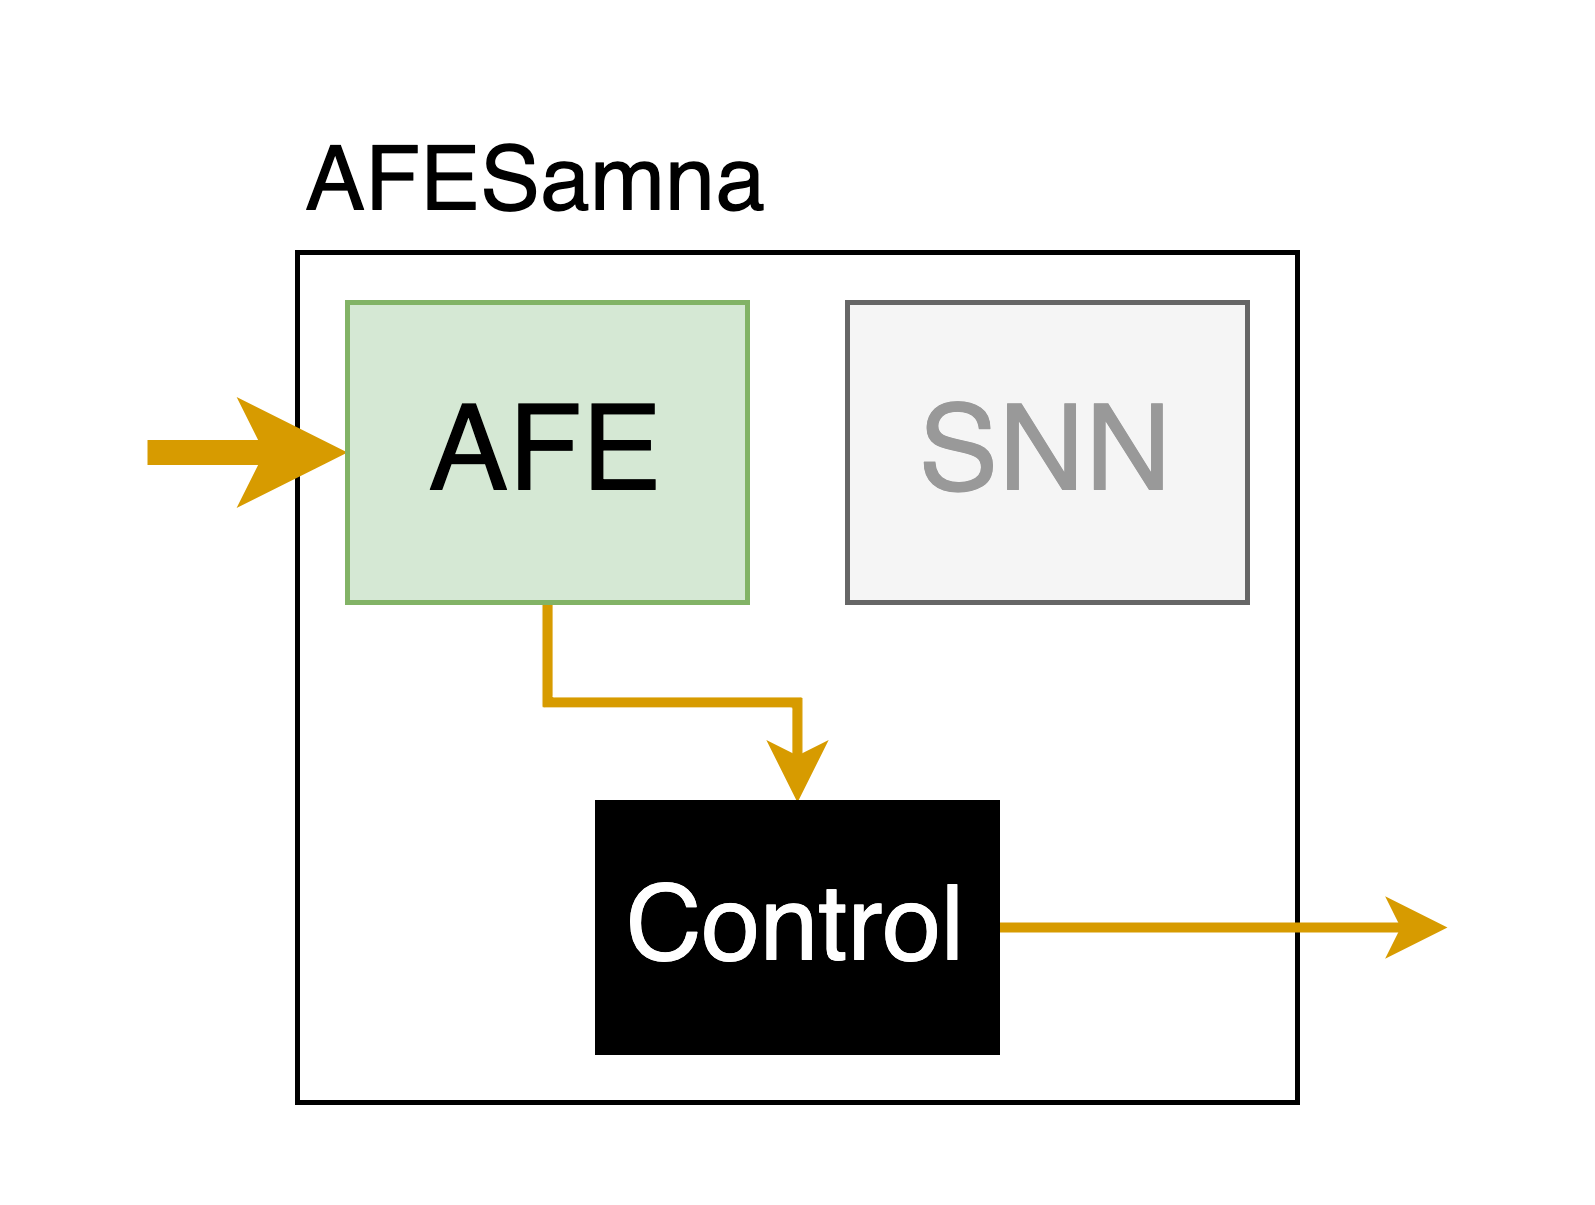
The AFE (Audio Front-End) is used to preprocess single-channel audio signals and convert them into spikes.
Here the audio signal is input to the AFE by a microphone mounted on the hardware dev kit, or an external differential analog audio signal.
The AFE has 16 output channels, and you can adjust its parameters via hyperparameters in the AFESamna class.
See also the introductory notebook Using the analog frontend model .
AFESamna allows you to access the audio front-end on the dev kit, and record encoded audio either from the on-board microphone or analog audio injected to the dev kit.
AFESamna also allows a custom config input which is without auto-calibration.
If you do not provide a custom config, we highly suggest you set auto_calibrate = True on instantiation, which helps to mitigate the effects of background and mechanical noise.
[17]:
Image('AFESamna.png', width=400)
[17]:
[18]:
# - Find and connect to a XyloAudio HDK
from rockpool.devices.xylo import find_xylo_hdks
xylo_hdk_nodes, modules, versions = find_xylo_hdks()
print(versions)

hdk = None

for version, xylo in zip(versions, xylo_hdk_nodes):
    if version == "syns61201":
        hdk = xylo
    if version == "syns65302":
        hdk = xylo

if hdk is None:
    assert False, 'This tutorial requires a connected XyloAudio HDK to demonstrate.'
The connected Xylo HDK contains a XyloAudio 3. Importing `rockpool.devices.xylo.syns65302`
['syns65302']
[19]:
# - Set the time resolution and duration to record encoded audio
dt = 10e-3
timesteps = 1000
[20]:
# - Create an AFESamna module, which wraps the AFE on the Xylo A2 HDK
#   (stay quiet while this cell is executing)
if xylo_board_name == 'XyloAudio2':
    mod = xa2.AFESamna(hdk, None, dt=dt, auto_calibrate=True, amplify_level='low', hibernation_mode=False)
elif xylo_board_name == 'XyloAudio3':
    mod = xa3.AFESamna(hdk, None, dt=dt, auto_calibrate=True, amplify_level='low', hibernation_mode=False)

print(mod)
AFESamna with shape (0, 1)
[21]:
# - Evolve the module to record encoded real-time audio as events
spikes_ts, _, _ = mod(np.zeros([0, timesteps, 0]))
del mod
[22]:
# - Plot some encoded audio events recorded from the AFE
plt.imshow(spikes_ts.T, aspect='auto', interpolation='none')
plt.title('#Spikes in AFE output channels')
plt.xlabel('Time')
plt.ylabel('Channel')
plt.show()
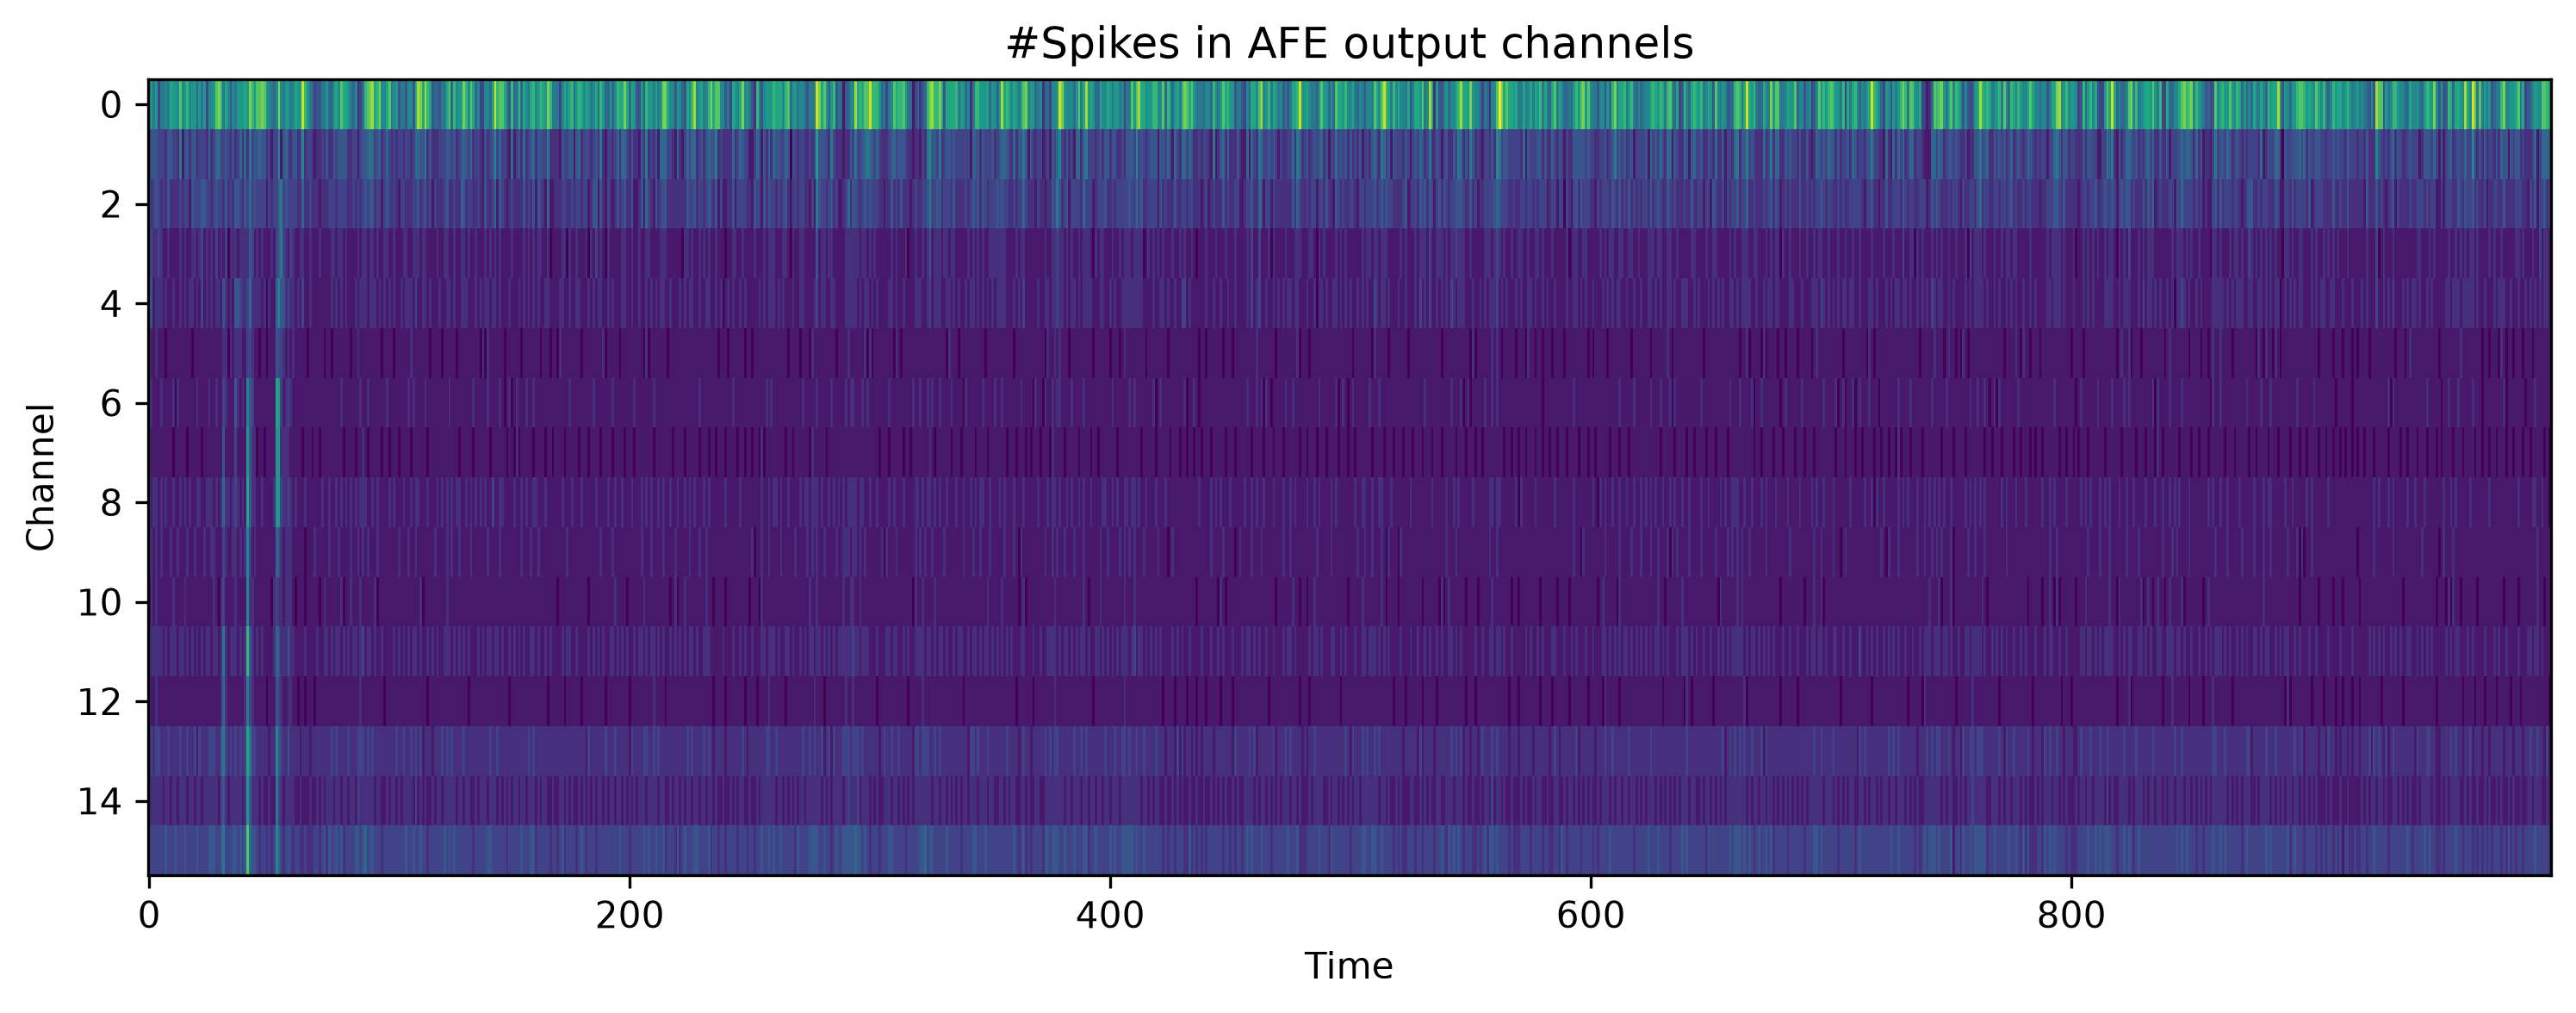
You can record encoded audio using the AFESamna class, and feed these outputs to the Xylo core for testing using XyloSamna.
You can also combine the two cores for inference, as shown in the following section.
Part III: Deploying the AFE and SNN cores in free-running inference mode
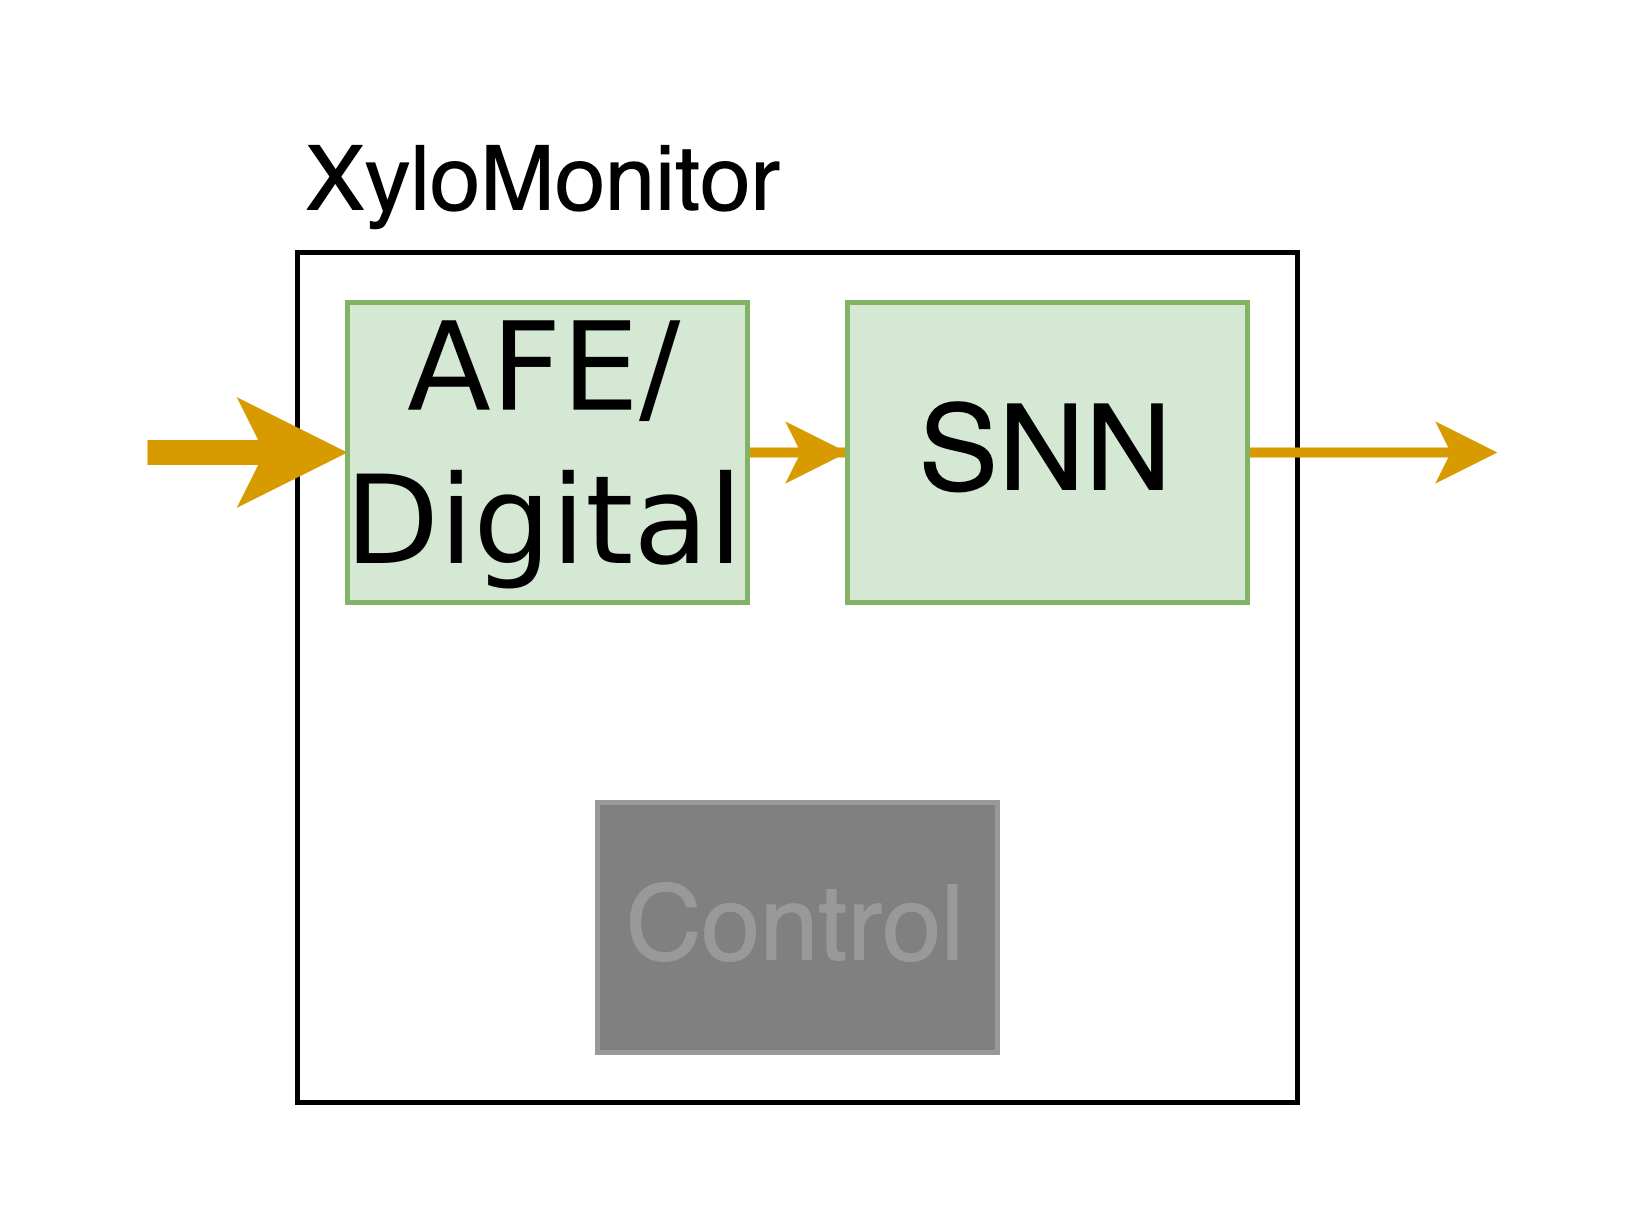
Once you have a complete chip HW specification, you can deploy it to the chip in real-time inference mode using the classes syns61201.XyloMonitor or syns65302.XyloMonitor for XyloAudio 2 and XyloAudio 3, respectively.
In XyloAudio 2, this mode uses the AFE core to preprocess audio signals in real-time and then sends encoded audio to the SNN core for inference.
In XyloAudio 3, this mode uses the digital microphone audio signal in real-time and then sends encoded audio to the SNN core for inference.
In this mode you only read the output events from the SNN core, without providing input.
[23]:
Image('XyloMonitor.png', width=400)
[23]:
[24]:
# - Find and connect to a XyloAudio HDK
xylo_hdk_nodes, modules, versions = find_xylo_hdks()
print(xylo_hdk_nodes)

hdk = None

for version, xylo in zip(versions, xylo_hdk_nodes):
    if version == "syns61201":
        hdk = xylo
    # - For XyloAudio 3
    if version == "syns65302":
        hdk = xylo

if hdk is None:
    assert False, 'This tutorial requires a connected XyloAudio HDK to demonstrate.'
The connected Xylo HDK contains a XyloAudio 3. Importing `rockpool.devices.xylo.syns65302`
[<samna.xyloAudio3.XyloAudio3TestBoard object at 0x7aaf0e8c84b0>]
[25]:
# - Use XyloMonitor to deploy to the HDK
output_mode = "Vmem"
amplify_level = "low"
hibernation = False
DN = True
T = 100

# - For XyloAudio 2
# - For XyloAudio 2 you need to wait 45s until the AFE auto-calibration is done
if xylo_board_name == 'XyloAudio2':
    modMonitor = xa2.XyloMonitor(hdk, config, dt=dt, output_mode=output_mode, amplify_level=amplify_level, hibernation_mode=hibernation, divisive_norm=DN)

# - For XyloAudio 3
# - XyloAudio 3 does not have the amplify_level parameter and does not do AFE auto-calibration
elif xylo_board_name == 'XyloAudio3':
    modMonitor = xa3.XyloMonitor(hdk, config, dt = dt, output_mode=output_mode, hibernation_mode=hibernation, dn_active=DN)

# - Perform inference on the Xylo board
# - The following line will evolve XyloMonitor for T time steps.
# - Keep in mind that this mode is using the microphone as input, hence the output might change according to the ambience noise
output, _, _ = modMonitor(input_data=np.zeros((T, Nin)))
Part IV: Measuring power on the XyloAudio HDK
For power measurements, please follow the detailed tutorial at 🐝🎵 Introduction to Xylo™Audio
[ ]: